Some months ago, I purchased the MagicShine MJ-808 front headlight for my bike, and in general I’ve been very pleased with it. The light output is amazing, reportedly 900 lumens worth; I now flood the road with a very usable light, as well as being very visible to oncoming traffic. I did have some problems with the battery LCD indicator, but after not working for a few days, it came back to life. In any case, that wasn’t too critical, since a multi-colour LED on the back of the lamp unit provides a good enough indicator of remaining battery charge. The delivery time also wasn’t great – at least a couple of months, I recall – but for £50 (around 80USD) it was worth waiting.
This addition rather put my existing rear light – an in-built two-LED lamp – seriously in the shade. I’d looked around at commercial offerings and not been much impressed; most units seem to contain a handful of flashing/static red LEDs with minimal current requirements, presumably so as to not require an external battery. However, I’ve a 36V 10Ah battery on my electric bike, so I decided to put together a DIY lamp.
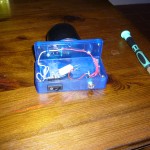
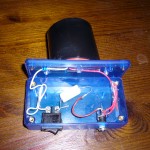
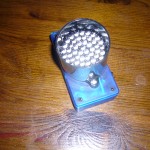
My solution is based around a 52-LED ready-assembled cluster, bolted to a small ABS project box that houses a high-power resistor, on/off rocker switch and DC power socket. Assembly was very easy; two circular drill holes were required to bolt the cluster to the project box, one for the lead to feed the lamp, and another for the external power socket. The rocker required a rectangular cut-out; this started off as several drill-holes in a line, was roughly shaped with a Stanley knife, and then made square using a metal file.
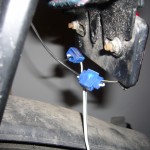
The wire-wound resistor is rated up to 3W, and is soldered to float inside the box, so that any heating effect doesn’t melt the plastic sides. The 180Ω value was selected as being closest to the required value of 160Ω (which itself was calculated using voltage readings from a multimeter and help from the interwebs). The bell wire entering the unit is connected to the existing rear lamp feed with automotive snaplocks. Finally, mounting is presently just a strong bungee cord on the rear carrier rack.
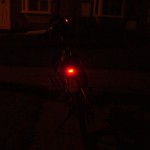
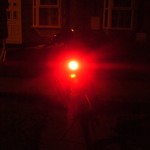
The light output from this lamp really is excellent, as the photo shows. The costs are thus (everything from Maplin):
- 52-LED cluster: £10.49
- Project box, ABS: £3.39
- Power socket, 2.1mm: £1.89
- Power plug, 2.1mm: £1.59
- Rocker switch: £0.89
- Power resistor, 3W: £0.55
- Bag of snaplocks, 10 off: £1.69
- Bell wire, 1m: £0.29
- Total: £20.78
That is somewhat cheaper than the premium lights on the market, which I think go for around £25, but in any case, I suspect the concentrated light from this unit is better, as is the throw distance. I think if someone were persistent, the costs could be reduced a little.
- Inside the project box
- Inside the project box (close-up)
- Lamp mounted on project box
- Rear carrier underside, revealing snaplocks
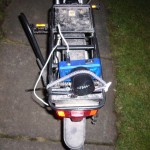
- Lamp mounted with a bungy cord
- Night-time rear view, bike lamp only
- Night-time rear view, both lamps on
It’s not been fully road-tested yet; current consumption and water resistance will be looked at keenly.
Points for future development: I need to find an inexpensive quick-release bracket that will allow the unit to snap on and off the bike easily. Also, if I were to mount the lamp on a fresh box, I’d do so diagonally as per the spec sheet; presently the beam is a little off-centre (though this doesn’t matter too much, since the viewing angle is allegedly 40°). Lastly, some research is required as to maximum legal brightnesses for road use, since at this intensity, the unit could be easily mistaken for a fog lamp!
[…] thread! By coincidence, I just built a custom rear lamp, and am powering it off the battery on my Juicy Bike. The main lamp component is a 52-LED signage […]
[…] agree in theory, and in fact I did that with a home-made rear light on my previous bike. But on my new Ave, cutting into a power line will almost certainly invalidate […]